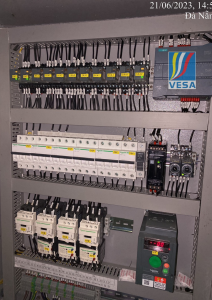
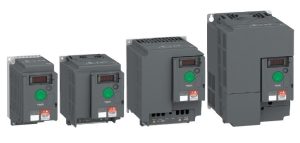
ATV310 Schneider inverter is a product line that is widely used in industrial parks and factories. However, for the machine to operate at the highest efficiency, it is necessary to know how to connect and install. With more than 10 years of using the ATV310 inverter for their systems, VESECO engineers will guide you in detail on how to connect and install the ATV310 Scheider inverter in a simple and accurate way.
1. ATV310 inverter connection diagram

+5V: Power supply for reference potentiometer
AO1: Voltage or current analog output
LO+: Logic output
LO-: Common of the logic output (emitter)
LI1 : Logic inputs
LI2: Logic inputs
LI3: Logic inputs
LI4: Logic inputs
AI1: Voltage or current analog input
24+: +24 VDC supply provided by the drive
R,S,T: 3 Phase Input
U,V,W: 3 Phase Output
PA/+,PB : Discharge resistor terminal.
R1A : NO contact of the relay
R1B : NC contact of the relay
R1C : Common pin of the relay
2. Quickly installation steps of ATV310
Step 1: Reset the inverter to factory default
ATV310E: COnF/ 102 = 64 (2s)
Step 2: Enter engine parameters, do auto tune (engine with label)
Go to the Motor Control menu and set the parameters:
- Motor type (50Hz or 60Hz)
- Rated power
- Rated voltage
- Rated current
- Rated frequency
- Rated speed
- Cosphi (depending on the type of inverter)
ATV310E: COnF/ FULL/ 300-/
- 301 =Engine type = 50
- 302 = C. rate VND / level VND / rate
- 304 = Electrical voltage/level/mechanical
- 305 = Current VND/level VND/mechanical
- 306 = Frequency VND/level/muscle
- 307 = Speed VND/level/mechanism
- 318 = 01 -> 02 (for tuning)
Step 3: Select the motor control law depending on the type of load
Law of motor control depending on load
Vector control
- Higher accuracy, high torque at low speed (0-10Hz)
- Better dynamic response than V/F . control
- Requires entering motor parameters and doing tuning
Law V/F
- For motor without parameter
- Multiple motors in parallel
- The motor has a small capacity compared to the inverter
ATV310E: COnF/FULL/ 300-/ 309 = 00 (vector law), 03 (U/f law), 06 (fan pump law)
Go to the Settings menu to install:
- Overload protection current
- Acceleration and deceleration time
- High speed restriction, low speed restriction
Step 4: Set working parameters
– Overload protection current setting
ATV310E: COnF/ FULL/ 600-/604/ 604.0 = motor rated current
– Set current limit (current limit)
ATV310E: COnF/ FULL/ 500-/ 511-/ 511.1 = customized according to user needs, up to 1.5 In
– Set acceleration time (ACC), deceleration time (DEC)
ATV310E: COnF/ 501.0 (ACC), 501.1 (DEC)
– Set high speed limit (HSP), low speed limit (LSP)
ATV310E: COnF/ 512.0 (LSP), 512.2 (HSP)
– Setting the carrier frequency/switching frequency
ATV310E: COnF/ FULL / 300-/315
Step 5: Install the inverter status relays
Relay 1 (R1A-R1B-R1C) has an error (relay closes when there is no error, opens when there is an error)
Relay 2 (R2A-R2C) stops running
ATV310E: COnF/ Full / 200/ 205 = 01, / 206 / 206.0 = 02
Step 6: Set the inverter status analog output
Set AO1 to report running speed, output from 0-10VDC
ATV310E: COnF / Full / 200 / 216 / 216.0= 130 (run speed indicator), / 216.1 = 10V (output 0-10V)
Catch on the fly function
ATV310E: COnF/ Full / 600/603 = 1
Summary of error codes and how to fix ATV310 Inverter
| Code | Name | Remedy |
| F010 | Overcurrent | · Check the parameters.
· Check the size of the motor/drive/load. · Check the state of the mechanism. · Connect line motor chokes. |
| F018 | Motor short-circuit | · Check the cables connecting the drive to the motor and the motor insulation.
· Connect line motor chokes. |
| F019 | Ground short-circuit | |
| F020 | IGBT short circuit | · Contact local Schneider Electric representative. |
| F025 | Overspeed | · Check the motor.
· If overspeed is 10% more than Top frequency 308 (page 52) adjust this parameter if necessary. · Add a braking resistor. · Check parameters of the speed loop (gain and stability). |
| F033 | AI1 current loss | · Check the terminal connection. |
| F014 | 1 Output phase loss | · Check the cables connecting the drive to the motor and the motor insulation. |
| F015 | 3 Output phase loss | · Check the cables connecting the drive to the motor and the motor insulation.
· Output current less than 6% rated current · Turn off error 605=no |
| F017 | Input phase loss | · Check power and fuses
· Turn off input phase loss error 606=no |
| F022 | Communication error | · Check the communication connection
· Check the communication settings |
| F030 | Undervoltage | · Check source quality
· Parameter setting 607 |
| F027 | IGBT Overheat | · Check engine capacity
· Reduce pulse frequency to 315 · Wait for the IGBT to cool down |
| F012 | Process overload |
|
Above is our detailed sharing on how to install the ATV310 Schneider inverter for your reference. Hopefully with the above sharing, readers have got the detailed answer as well as understood how to install the Schneider ATV310 inverter.
VESA with more than 15 years of experience in the field of wastewater treatment, are proud to be a prestigious and leading unit in the Vietnam market. Coming to VESA, you will be absolutely committed to the best quality, products and after-sales service available today. Contact us immediately at Hotline: (+84) 904 571 488 to receive the most accurate and attentive care.

